 |
| On the front door. It was so big, I had to put it over our window! |
First thing I had to do was to remove all the tags and stickers from the flip flops. I separated them so that one of each color would be on the bottom layer, and the other one would be on the top layer.
I tried to arrange the flip flops in a random pattern but each way I tried ended up leaving part of the cardboard ring showing. I finally gave in and took all the left flip flops and put them on the bottom, with the toes facing inward. I put them at an angle so try to make the wreath a little smaller. I then took the right flip flops and placed them in between the bottom layer, going the other direction. This seemed to be the best way to get them all to fit snugly.
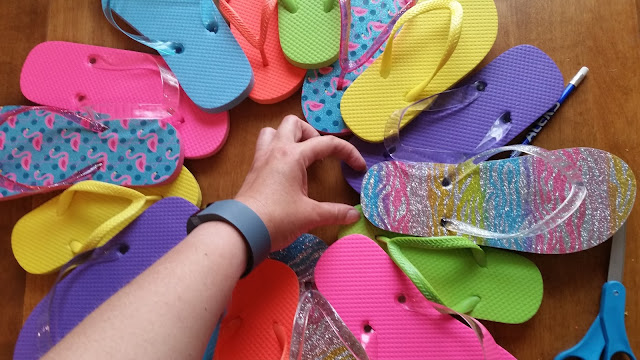
I also used the marks in hopes this would help me put them back in the same place after applying the glue. However, it didn't help with the angle. So I would pick up the flip flop with my fingers against the wreath, so when I sat it back down, I'd just put my fingers back against the wreath again. (See below.) This method worked well and made the process go faster.
After the bottom layer was secure, I started on the top layer. This is when the photo of the placement helped. I put the flip flop in place, then mark it with my fingers and apply the hot glue. I used an ample amount of hot glue for this top layer since there's less surface area touching the bottom flip flops. Also, I put the hot glue on the bottom flip flops and then put the top one on. This cuts down on getting hot glue everywhere.
(Keeping track of where the flip flop was so I could put it back in the right spot after applying hot glue.)
Here's the back once I was done gluing them to the wreath.
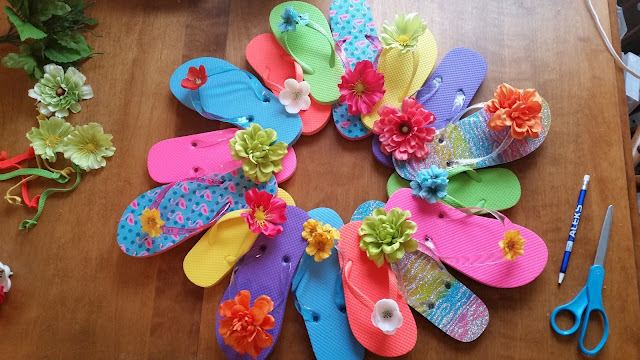
The last step was to pull the silk flowers off the of the stems and hot glue them to the flip flops. I had a wire cutter just in case they wouldn't come off or if I wanted the back of the flower to be flat. I placed the flowers at the "Y" of the straps of the flip flops. I missed one on the bottom flip flops and didn't realize it until I counted to double check that I had gotten them all. (So many flowers!)
Normally I put smaller wreaths on my door so that they fit next to the window. However, this was just too big and almost took up the whole door. Instead of putting another nail in my door, I used a Command wall hook. Hopefully it'll still be hanging on the door in the morning! (If not, I'll find an over-the-door wreath hanger.)


